Thursday, December 29, 2011

Old World Manicotti


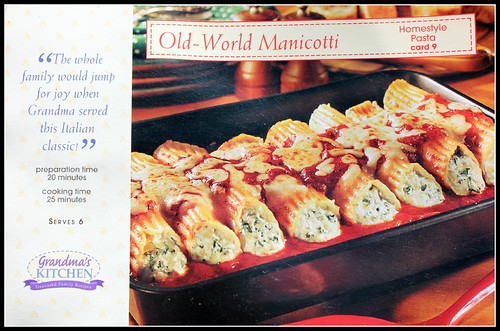
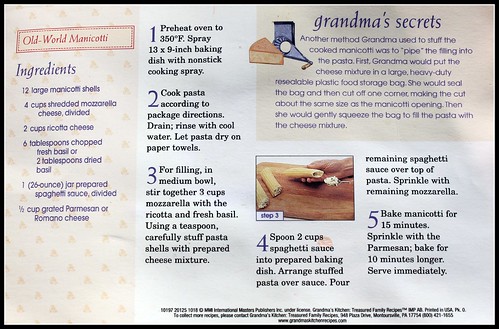
Old-world manicotti holds some sweet childhood memories for me. When we were young, my mother's friend would visit our family and each time, she would make some type of pasta for us. It was then that I first had manicotti and I've loved it ever since. I made it myself for the first time when I was holding a little gathering. I was digging through my piles of recipe cards when I found this one:


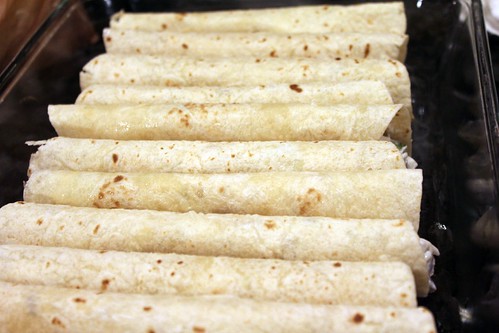
I just knew I had to make it. Though it tasted as amazing as I remembered it to be, I ran across a big problem while making it. All the manicotti shells had broken while they were being boiled!


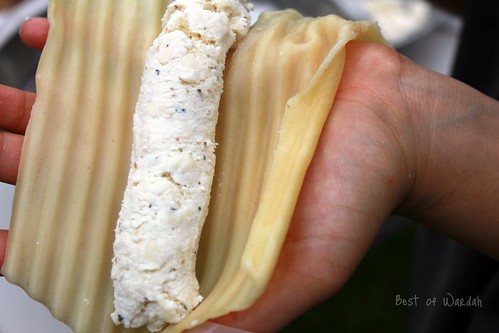
I decided that to solve this, I had to pipe the manicotti filling onto the shell as planned. But then, I would wrap the two edges of the shell around the filling and place it seam side down on to the dish. This proved to be successful! So if any of you decide to try this recipe out, don't worry about the problems. They can all be fixed and as my dad loves to say, "It all looks the same in your stomach anyways."


Sadly, I don't have any pictures of the final dish for you guys. We were too busy digging in to take pictures. But, do enjoy the recipe card from Grandma's Kitchen! Best of luck,

Wardah

Tuesday, December 27, 2011

DIY: Creative, Easy Centerpiece


If you want to create your own fun and creative centerpiece, a can of soda can be a surprising but lovely -and inexpensive- choice to brighten up any party. Not only do they look festive and chique, but are also very good conversation starters. These easy centerpieces can be low, so they will not block overhead conversation and view, but they can also be tall to create a more dramatic appeal.


What You'll Need: 

Soda cans
Can openner
Knife
Floral tape or wire
Pebbles or small rocks
Water
Flowers
Ribbon (optional)

Step 1: Prepping the Cans

     - Start by emptying your soda can of its contents.
     - Remove the popper and use a can opener to remove the lid of the can.
     - Note: Using a can opener on a soda can may be tricky because of its thin material. Do not apply too
       much pressure to the empty can or it will dent. Your can opener might leave permanent dents or
       punctures on the rim of the can as it moves around, but do not worry; they can be covered.
     - Wash out the can and fill it halfway with water.
     - Place a rock at the bottom of the can to secure it from tipping over from the weight of the flowers.

Step 2: Assembling and Securing the Flowers 

     - Remove excess foliage and thorns from the stems of the flowers.
     - Hold the flowers in your hand and create the arrangement by adding flowers one by one. You can
       place the flowers at different heights to create a fuller appearance or create a dome effect by slightly
       lowering the flowers on either side of the center flower after each addition. 
     - Be careful to equally balance the flowers on each side of the arrangement or the can will tip.
     - Using the floral tape or wire, bind the stems at the natural spot where they join.

Step 3: Measuring and Cutting the Centerpiece 

     - Measure the arrangement alongside the can to gauge how much you'll need to trim.
     - Cut the stem in your desired length at an angle so the flower can better absorb water.

Step 4: Finishing the Centerpiece 

     - Gently place the arrangement inside the can.
     - Keep the arrangements misted and in a cool place away from heat and light until you are ready to use
       them.


Wednesday, December 21, 2011

Vegetarian Enchiladas


Hello and happy holidays everyone! 

How is everyone enjoying their break? I'm certainly enjoying mine. It's been highlighted with loads of laughter, good times, and even better food. Speaking of good food, one mouth watering dish that has been on my mind recently is vegetarian enchiladas. After being constantly bombarded with thoughts of enchiladas, I finally decided to give it a go, making vegetarian enchiladas as to suit my entire family's tastes.

In the process of making the enchiladas, I snapped a few quick shots so I could share it with everyone. So, enjoy my rendition of the classic enchilada!

Vegetarian Enchiladas
Serves 6

16 oz. sour cream
16 oz. cream cheese
1 can of black beans
1 cup cooked rice
1 cup chopped green onions
1/2 cup jalapeno peppers
salt and pepper (optional)
12 tortillas
1 can enchilada sauce
shredded Mozzarella cheese

1. Make filling:

Mix sour cream and cream cheese together until smooth.
Drain and mix the beans in.
Mix in the cooked rice.
Add in the jalapeno peppers and green onions. Add salt and pepper to taste (optional).
2. Preheat oven to 400 degrees. Lightly oil a 9" by 13" baking dish; set aside. Warm tortillas on stove. Top each tortilla with a heaping of filling; roll up tightly and arrange, seam side down, in prepared baking dish.


3. Top with sauce and dividing evenly, sprinkle enchiladas with cheese. Bake, uncovered, until hot and bubbly, and cheese has melted, 15 to 20 minutes.


4. Cool for 5 minutes before serving. Enjoy!

Love,
Wardah
© Best of Wardah. Made with love by The Dutch Lady Designs.